Showing posts with label Holiday. Show all posts

Sunday, December 20, 2015

Evergreen Garland


I had some extra evergreen boughs left over from making my Christmas Wreath earlier this month. I really like how garland looks on a house or railings or fences… and it smells so good! I decided to give it a shot – and if it didn’t work out? Well, I’d be no worse for wear… and the scraps would just still be scraps.

Making this garland was a bit like making my flower crowns for my wedding. You just cut up a bunch of boughs into smaller sprigs. Then, all facing the same direction, tie them together with a wire, twisting it around and then add another piece to lengthen and wrap the wire around that piece and keep going. Spiral the wire around and up the sprigs as you add more and more until you reach your desired length. That was two long sentences. But that is how easy it is.


[try to ignore the hideous mums that I haven’t cut back yet haha]
I hope you feel inspired to make your own garland! It’s super easy! I know I don’t have many pictures so please post questions if you need more explanation!

Thanks for stopping by!
Happy Holidays!
Cheers,
Bridget
XOXO

Sunday, December 13, 2015

Christmas Wreath 2015


Every year I make a Christmas wreath. I guess it's becoming a tradition. I think once I started wanting one and took a look at how ghastly expensive they can be  I was much more motivated to make one myself. Turns out, it's wicked easy and wicked cheap to DIY.

Each year we cut down our own tree. Aside from it being a magical Christmas experience -- and judged to be the only 'proper' way to get a tree if you are a true Christmas celebrator (whatever) -- I think these tree farms are making out like bandits. I mean really, though... we do all the work. We pick and cut and drag the tree from the center of some field back to the car, hoping to only get sap on things that can be cleaned. But we do love spending some time outside in the fresh air before it gets too cold to enjoy anything. And the hubs enjoys feeling like a he-man by chopping down the tree. And I enjoy watching him. We get to wear our Flannel shirts and drink hot cider. It's a process, but it pumps us with some Christmas cheer to start the season... before all the craziness rolls in.

I digress. When we get our tree each year we save the bottom boughs that inevitably have to be chopped off so the tree fits in the stand. Sometimes I even grab other people's left-behind branches too. [Lord knows that the tree itself costs more than enough for me to feel within my right to take home extra scraps.] I buy a wire wreath frame for $2.50 and some floral wire for $2.00 and I make my own wreath. If I feel fancy, I add some berries and a bow. It takes me 20 minutes. Do it this way and you'll never again spend $50 or more for a pre-made wreath.

My tutorial from a few years ago is HERE. I think next year I’ll give it a revamp.


Wreath on, people – save some money for gifts, or charity, or one of the few “one for me, one for you” purchases that might inevitably come your way. Don’t you dare pretend like you don't know what I'm talking about. ;)


Happy Holidays and Merry Crafting!
Thanks for stopping by!
Cheers,
Bridget
XOXO

Wednesday, February 4, 2015

Heat Pack

Wow, New England is definitely living up to it’s snow standards this year. For a while there I was convinced that this would be a light snow year. I was wrong, obviously. Our house has been hit with almost two feet of snow in the past week. That’s a lot of shoveling. And a lot of back aches. I’ve been meaning to make us a new heat pack for a while since I discovered how easy they are to make.  That being said, it was put on the back-burner (no pun intended) over the holidays. Now that snow is here and backs are aching all over the country, it’s perfect timing for this tutorial.
IMG_20150203_205411_418
Supplies you will need:
- 1/2 yard fabric (cotton or flannel)
- cotton ribbon cut into 2 x 24” pieces
- bag of uncooked rice
- The Usual Suspects: sewing machine, thread, scissors
1. Start by cutting your fabric into two rectangles, each 10” x 21”.
IMG_20150202_172624_045
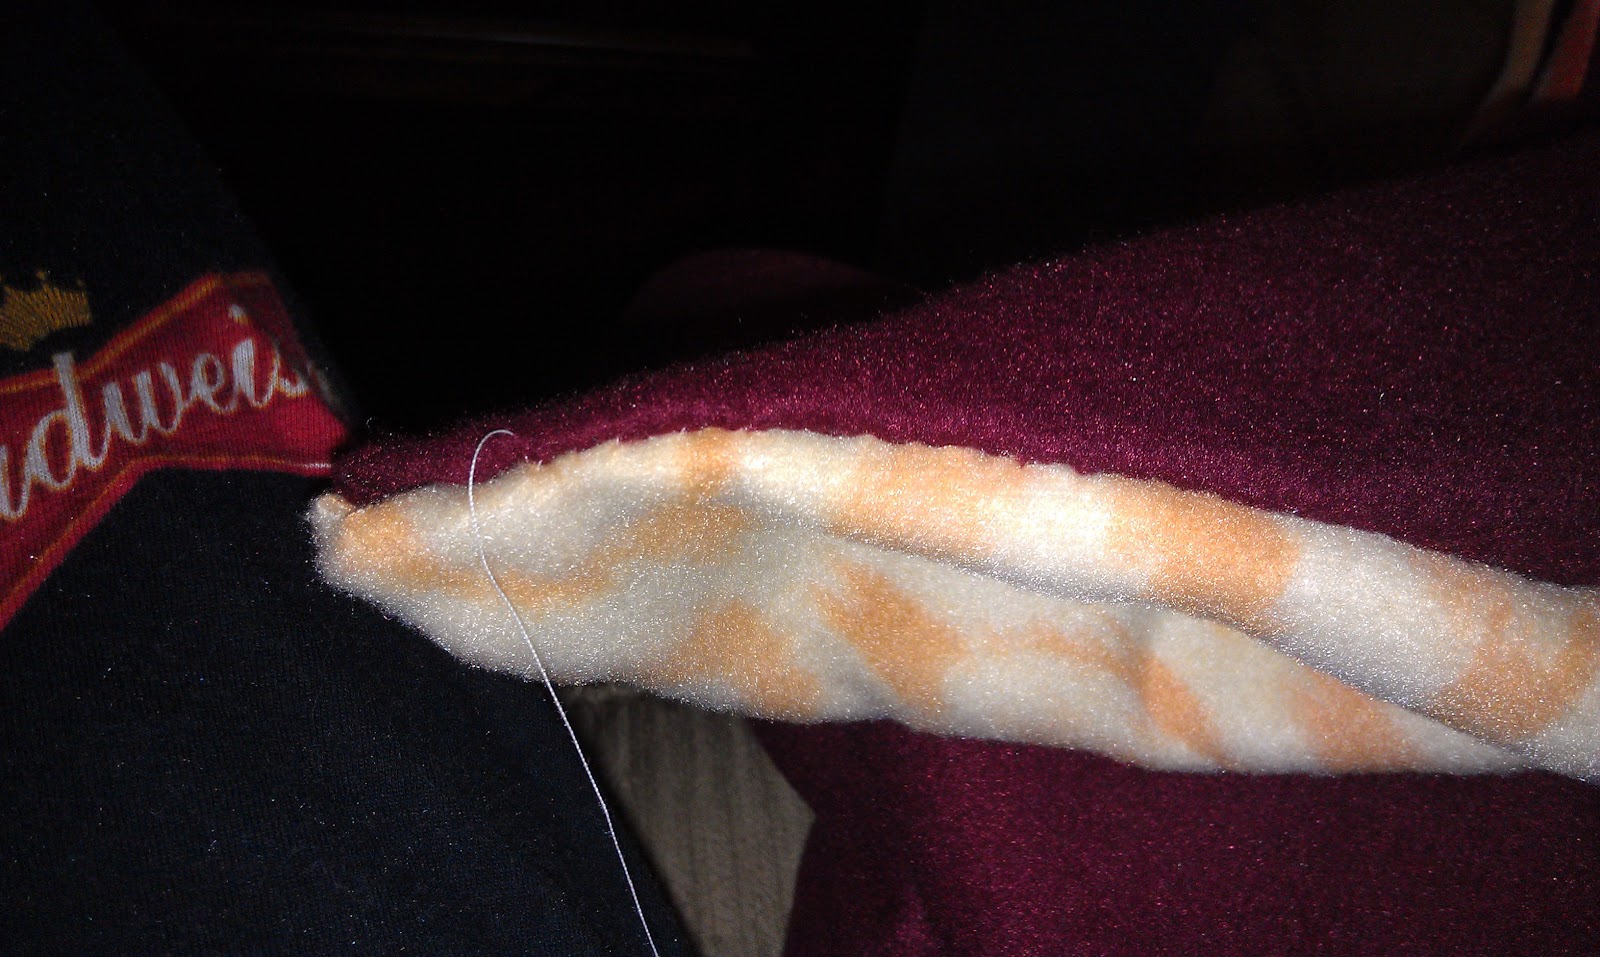
2. Place your fabric rectangles right sides together. Then, sandwich one piece of ribbon in the center of one of the short ends of your rectangle sandwich, with a small amount sticking out. (please look at the picture, this part is challenging to explain)
 IMG_20150202_173325_146   IMG_20150202_173318_145
3. Pin and sew your fabric sandwich together on three sides- the two long sides and the short side with the ribbon sticking out.
IMG_20150202_174735_704
4. Turn right side out, pushing out corners. Topstitch same three sides with 1/4” seam, but stop 1” from open end. This will allow you to turn in the end and sew your opening closed later.
IMG_20150202_174751_931
IMG_20150202_174824_150
5. Now for the fun part. And the tedious part. Hold on to your patience… it’s worth the end result! Start by pinning every 3 1/2” along both sides of the pack. These will be used as guides for sewing as we add rice.
IMG_20150202_181020_313
6. Add 1 1/4 cup rice to your pack. Sew along the rice from first pin to first pin, closing in the rice you just put in there. This requires some finesse. push the rice out of the way as you go and take your time. Don’t worry about running over rice, it won’t ruin anything.
IMG_20150202_175000_092 IMG_20150202_175115_935 IMG_20150202_183057_071
7. Repeat the process of adding rice and closing in each pocket until you have reached the top. You should end up with 5 total pouches of rice.
8. For the last pouch, add your rice, then turn in the end of the pouch and pin closed, adding the end of the last piece of ribbon to the center. Topstitch the end closed twice – once with a 1/4” seam, then closer to the end for double coverage. This is just to make sure no rice pops out if one of those seams comes loose with rough-handling.
IMG_20150202_183601_751
Use:
- For heat: heat in microwave for one minute. Reposition and heat in 30 second increments until hot, not to exceed a total of 2 minutes.
- For cold: put in freezer overnight to enjoy as a coldpack.
- Handwash with water and mild detergent, let air dry for 24 hours before use.
IMG_20150203_215207_422
Thanks for stopping by!
Stay warm, everybody!
Cheers,
Bridget XOXO

This tutorial was featured on Fridays Unfolded!!

Sunday, December 21, 2014

Christmas Wreath 2014

Hi All! Thanks for stopping by! The Fresh Christmas Wreath tutorial has been revamped and reposted on the new blog site. 

https://craftybridge.com/portfolio/fresh-christmas-wreath/

I hope you'll check it out - making your own wreath is easy and can save you a ton of money!


Merry Christmas!
Thanks for stopping by!
Cheers,
Bridget XOXO

Wednesday, December 3, 2014

Faux Fur Pillow Covers

Happy Holidays friends!! I am currently knee deep in Christmas gift crafting and sewing. I’m trying to keep my head above water, but I’m too stubborn to admit that I might have taken on too much this year. Just ask Joe… my craft room doesn’t have a door and I keep finding him with the measuring tape. He’s too nice to tell me that the room looks like a fire hazard.

Alas, yesterday I finally made something I can post without spoiling any gifts. I keep seeing these pillows that are made of fur, faux fur, etc. They are luxuriously soft, fluffy, and so reminiscent of Winter. BUT. They cost a fortune. Pillow covers alone cost $40-$80, depending on where you look. Not in my budget.

Luckily, I found a bunch of different faux furs at the fabric store. I found the one I wanted – enough for 3 pillow covers – $ 13. Boom.

IMG_20141202_124545_664

What you will need:
- Faux fur of your choice – I bought 1.5 yard
- Ribbon
- The Usual Suspects – sewing machine, thread, scissors

1. Cut your faux fur – I cut mine as rectangles 18” x 40”.

2. Fold your rectangle in half (the hamburger way) with fur sides together. Sew two parallel sides together, making a U-shape. I left the opposing side to the fold open. I like the rustic look.

IMG_20141201_194255_004

IMG_20141201_200503_154

IMG_20141201_200446_964

3. Tack on some ribbon to tie closed the open end of the pillow cover. I used some leftover black ribbon – 10” each, two on each side. They make a nice little bow!

IMG_20141201_200510_852

4. Before turning, I learned that the freshly cut edges made a big mess of loose fur – shake the pillow cover over a trashcan, then using a lint-roller, do a once-over. As awesome as this fur is, it makes a mess when it is cut.

5. Turn, do one more pass with the lint roller. Then cover your pillow. And prepare to fight for these pillows on the couch. The cat, dog, husband, and kiddos are going to be serious competition.

IMG_20141202_124401_385

IMG_20141202_124626_994

IMG_20141202_124439_583

Enjoy! Happy Holidays!
Thanks for stopping by!
Cheers,
Bridge XOXO

Monday, January 28, 2013

Wood Slice Coasters

When the holidays came to a close and it came time to toss our Christmas tree, I did a little begging and bribing to get Joe to chop off a few slices of the trunk. I have been giddy to make coasters out of wood trunk slices. They are all different and full of character! There's something I love about the texture and earthiness they bring to a room.

*Sorry for the lack of pictures, I got a little enthusiastic in the beginning and forgot to take photos!


Wood Slice Coasters
What you will need:
  • Slices of wood from a trunk or thick branch - let them sit out and dry for a week or so
  • Sand paper
  • Polyurethane or other wood sealer
  • Felt brush
  • Silicone calking (can be found at any home improvement store) (you could also use felt instead)
  • Wax paper
  • Level
Step One: sand down your "slices" of wood... You only have to do one side, but feel free to do both if you want. Leave the raw edges alone, the bark add character.

Step Two: brush off all sawdust and wipe down each wood slice with a damp cloth.

Step Three: coat the wood slices with two coats of polyurethane according to the directions on the can. Also coat the sides. I skipped the bottoms.

Step Four: once dried, lay out a piece of wax paper and on the underside of each slice, add a few circles of silicone. This will prevent sliding and protect surfaces.


Step Five: flip over your slices so they were silicone side down in the wax paper. Take a small level and level out the coaster by pressing on each side until level. The silicone will help level the coaster.


Step Six: let dry overnight. Then, carefully peal the coasters from the wax paper and flip them over to finish drying for another day.

There you have it! Non-slip coasters that are unique and beautiful!


Thanks for stopping by!
Cheers!
Bridget, XOXO

Thursday, December 6, 2012

Fresh Christmas Wreath


 This year, Joe and I got our tree the weekend after Thanksgiving (I know, where did we find so much motivation?). We like to cut down our own tree – we get a bigger selection, we support local farming, and Joe gets to exercise his manly side and use a saw. Who can blame him? I know I don’t mind J
          So after we haul the biggest tree we can fit on the car to the apartment, we always have to do a little trimming of the bottom branches so the tree fits nicely in the stand and gifts fit underneath. And, you know me, I have to keep each and every branch that comes off that hunk-a-big-ol-tree. And then they sit on my porch for a few weeks… or sometimes until January.
          This year, I’m recycling them – finally. I made my own fresh Christmas wreath! I was intimidated at first, but after looking at numerous tutorials, YouTube videos, etc., I gave it a go… and it was seriously simple. Any of you who are getting your own fresh Christmas tree this year, you are bound to have a few clippings… save yourself the money and make your own wreath! It smells amazing, takes less than a half hour to make, and is almost free.


Fresh Christmas Wreath

What you will need:
  • Wreath form – I used an 18” here, but it made a massive wreath. Go smaller if you have less clippings or a smaller door. Costs only a few bucks at any craft store.
  • Evergreen clippings – cut up those branches from the bottom of your tree into smaller pieces
  • Shears
  • Floral wire
  • Ribbon (optional)

Step One: Get your supplies ready. Chop up those branches, make a pile. Spread out some newspaper if you want to protect your surfaces from sap. I highly recommend this if you are doing this inside.

 Step Two:  The first piece needs to be knotted in place. After this, you will just keep wrapping the wire around the wreath form and evergreen twigs.


Step Three: Keep placing clippings along the wreath form as you make your way around – don’t worry about perfection, you can always go back and add pieces here and there, as well as clip some of the stray odds and ends.


Step Four: Hang that bad boy up and check it out. Mine was a little heavy on one side, so I added some twigs in the lighter areas, just taking some floral wire and tying them in.

before

after

Step Five: Add a bow and hang up that gorgeous creation! I use two upside-down hooks on the inside of my door. This way, when I don’t have a wreath up I don’t have to just look at the hooks.


Happy Holidays! Thanks for stopping by!
Bridget, XOXO

Saturday, November 10, 2012

Holiday Plates


          Woof, it has been a rough week here – the slew of storms (hurricanes, nor’easters… you name it, it happened here in the past two weeks) has knocked my immune system down and I’ve been battling a cold for a few days now.
          Last week I found myself in Homegoods (how did I get here?) and I raided the discount Halloween stuff. On top of that, I found a dish set on the clearance rack for $10 because one dish was cracked…. That’s 20 dishes for $10. All plain white. Amen.
So I stopped next door at JoAnn’s (Yes, it’s next door. Yes, it’s very dangerous.) and grabbed a couple paint pens. I previously used Sharpies to draw on mugs, which worked great, but I’ve been wanting to try these pens for a while and they aren’t that expensive.

This is what I did: I drew on some of these cute plates for sweet holiday gifts.
How did I do it?:  I cleaned the plate, drew on it with Sharpie paint pens, then stuck it in a 350F oven for 30 minutes.


I can’t believe I haven’t done this before. Imagine how good those $1 Goodwill dishes could look?? Amazing.
Let me know how your dishes turn out! I love your comments!

XOXO Bridget


Friday, October 12, 2012

Fleece Blankets


          Whew, what a week… had a few setbacks in the back department… physical therapy says one more week at home, officially making this a full month ordeal. In fact, today is the one month mark of my sprain. The body is a slow healer when you want it to go fast, right? Well, due to this one more week at home I have thrown myself (not literally, I’m mostly confined to the couch and my craft table), into gifts for upcoming birthdays, holidays, etc. I got myself all excited for these projects, took a million photos, bladibla… and realized that if I posted tutorials on any of them, the surprise of these gifts would be ruined. Hm.
          So, to cap the week off, I’m going to write about fleece blankets. I have made a slew of them for various people, gifts, myself over the past week. I’m going to show you a few different ways to make fleece blankets, but my tutorial will focus on the sewn version.


Fleece Blankets


What you will need:
  • 2 yards each of two fleece fabrics (I like a big blanket, feel free to adjust to your preference)
  • The usual suspects: scissors, sewing machine, thread


Step 1: Cut off the crappy edges (official term of course) from both fabrics
Step 2: Line up the two fabrics, good sides together,  and cut so that they are even


Step 3: Pin edges together all around blanket (remember to keep those good sides together… you will see why in a few steps).


Step 4: Sew along entire edge of  blanket with a half inch seam, but leave approximately six inches at end open.


Step 5: Turn blanket right side out

Step 6: Blind stitch that six inch hole closed. I would show you how to blind stitch, but I’m not even positive if I’m doing it right. Think of it as a whip stitch with the whip on the inside J that’s the best description I can think of. My apologies… google it.


Step 7: Set your sewing machine to the overlock stitch (also known as the serger stitch) and sew another seam with a 1-2inch seam around the blanket.


Badabing badaboom! A fleece blanket that looks professionally made. How easy was that? You know you want to jump on JoAnn's next fleece sale :) 


Other Options: No Sew
Single knot: Cut strips along edge of blanket and finish with single knot


Double knot: Do same as above, but double knot instead.


Braided: Cut 2" strips along edge of blanket and within each strip, cut small hole. Thread each strip through hole of consecutive strip, following all around blanket. This is easiest with a crochet hook or opened paperclip. This is my favorite for a no-sew fleece, even if it takes a little longer... you don't feel any knots if you lie on the edge!


Happy Friday! If you have any questions or have any other styles for making fleece blankets, please share!!