Showing posts with label DIY Wedding. Show all posts

Thursday, July 7, 2016

Bridal Shower Card Book

Just over a year ago, my friends and family threw me an amazing bridal shower. In fact, just the other day it popped up on my "on this day..." page on Facebook. I got a little bit misty, honestly. As awkward as I was in the center of attention, I felt like a queen that day. All thanks to some amazing women.


As I clicked through the pictures that surfaced on Facebook, a full-on case of nostalgia came over me. There was no hope. I decided to dig up my bridal shower cards. I knew exactly where they were - neatly piled in a basket... on top of a pile of other wedding and craft crap that I needed to find a place for. Real romantic. I had to fix this situation.
Years ago someone had told me they had their wedding cards bound, which is an amazing idea. I didn't want to pay for this and I didn't have the patience to sift through Pinterest [sidenote: is anyone finding Pinterest to be getting SUPER congested these days?], so I figured out how to do it myself. It isn't rocket science. But nonetheless, it came out perfectly and it was far less daunting than I expected. It was exactly what I needed to honor this little memory and keep it safe to look back on from time to time.


Bridal Shower Card Book

Things you will need:
1/4" wide Ribbon (length - about 2 feet, cut into 2 equal halves)
Scissors
Hole-punch
Bridal Shower cards

Start by stacking your cards - all with the bindings to the left - and in any order you choose. I chose to stack my cards from smallest to tallest and I aligned them all on the bottom.
  • NOTE: Depending on how OCD you are, you can do this a number of ways. I'm rather compulsive so I chose an organized route, but feel free to stack your cards in whatever order floats your boat.
Next, start hole punching. Choose a width between holes that will fit the smallest card at it's widest - this will ensure stability with the rest of the stack but won't leave the small card dangling with only one hole in it. Also, hole punch close to the edge of the binding, but not too close. You want to be able to open the cards when the book is finished, but you don't want them to tear easily. Also, be deliberate here, you don't want to oops on your most precious cards. Also, also, yeah. Don't mind my aforementioned OCD.


After hole punching your first card, align your second card with the bottom of the first, stacked. Hole punch through your first holes into your second card. This will ensure that your second card has the exact same holes and hole spacing that your first card had.
Continue this process with each next card (using the prior card as the hole punch guide).


Once all cards are hole punched, stack them neatly again. Pick your favorite card for the front. Maybe it has a sweet saying or maybe it's from a special person. Put it front and center and honor it.
Taking your ribbon, start threading each card, one by one. Tie the ribbon. Repeat for the second hole. Trim excess ribbon.


All done! Store is a safe, dry, cool place so the cards will last. 


This whole process took me half an hour. I'm pretty sure I did it while Joe and I watched TV. Extra time allotted for nostalgic reading, of course.
This post concludes our wedding season craft party... time for Summer crafts to happen!

Thanks for stopping by!
Cheers,
Bridget
XOXO

Tuesday, June 28, 2016

Painted Bamboo Utensils


2 more bridal showers down, 2 to go! 2 weddings down, 3 to go!This year is in full swing. These casserole carriers are a hit. I almost forgot to tell you guys about the painted utensils! Along with a casserole dish and carrier, I included a set of bamboo utensils which I jazzed up a bit. Here's how I did it.
Using painter's tape, I wrapped the utensils to make stripes. It helps keep the lines clean. If you don't have painter's tape you can still do this, but eyeball it. Then using acrylic paint, I painted about three coats of paint, waiting at least twelve hours between each. Once done, I pulled off the painters tape and used a razor to clean up any uneven edges.


This is a quick, very easy way to spice up a pair of ordinary bamboo utensils. The acrylic should have no problem getting wet or washed.


Sorry for the lack of quality pictures, I think I got so into painting I forgot to take them! 

This would be an awesome pairing for hostess gifts, casseroles, or cake mixes. I might even try them at Christmas with a crockpot and recipes.

Thanks for stopping by!
Cheers,
Bridget
xoxo

Tuesday, April 26, 2016

Casserole Carrier

Wedding season is rolling in and the first few bridal showers were this weekend. I love wedding season. It's a time of year when new beginnings are everywhere and I'm reminded that life is full of reasons to celebrate. My job as an ICU nurse can be hard - emotionally and physically taxing, and no matter how hard I try, I absorb the pain and suffering of the patients and families I care for. That being said, the reason I craft, blog, and focus on what I love on my days off, is to heal from that. It's important for me to remember that the joys in life are what keep us going; and we shouldn't struggle for reason to celebrate every day. Life's too short not to.

So, let's celebrate WEDDING SEASON. I'm admittedly falling off the organizing bandwagon. I'm ok with it. I'll keep organizing the house and I'll take pictures and post them at a later time. Wedding season is just too much fun to wait for. kthanks.

My college roommate, Marissa, is getting married this year and I'm psyched to celebrate with her. She was my lifeline during college and I'll never forget the days and nights we spent dreaming of our weddings. Real life took us on a breeze and so much has changed since college, but she still holds such a special place in my heart. She is brilliant and beautiful and I'm so glad I was able to celebrate her and her fiance this weekend!


My new favorite bridal shower gift is an etched casserole dish with carrier. I made one for Marissa and  I know it will get use with all of her mom's amazing Italian recipes.  I found a decent tutorial at 2 Little Hooligans and made a couple of small adjustments to fit my dish. I also added cotton strapping as handles instead of making the handles from scratch - that required about 1.25 yards of strapping. It was easier than making my own and I'm more confident they will handle some beating.


Check out the etching. Pretty sweet, right? Also super easy. I'll be detailing how to do that in my next post. Stay tuned.

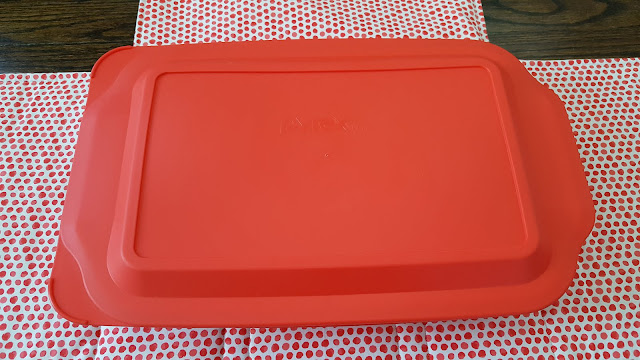
I included a cover so that the pyrex content would stay contained


I can't wait to make more of these with some gorgeous fabrics. Talk about a perfect wedding, birthday, or Christmas gift! No more packing your casserole dish with towels to carefully carry to your potluck. I love a practical gift.

Thanks for stopping by!
Cheers,
Bridget XOXO

Thursday, October 22, 2015

Wedding DIY: Flowerless Centerpieces

Bridget & Joe-257 Bridget & Joe-251

Our wedding had a strict budget. And we blew it out of the water. Even with all of the stuff we did ourselves and the items we omitted. Honestly, it was our own fault because we didn’t know what we were in for --- it is VERY hard to plan a budget for something you have never planned and when most people you will be referencing had budgets that span tens of thousands of dollars with varying results. That being said, we knew we needed to pinch pennies where we wouldn’t miss them. And that included flowers for our centerpieces. I went all out for our bridal party florals with the amazing Earth Blossoms and still kept my floral budget under $1000. My centerpieces cost me between about $25 each. And for the tables that my bridesmaids said at, their bouquets became the centerpiece.

My centerpieces were simple – I want guests to be able to talk across their tables. But I also wanted some interest and to keep with our garden and rustic themes. Lanterns with faux candles, cardboard letters, and ball jars filled with moss, eucalyptus and grape vine sprigs. The lanterns I found at various craft stores and Homegoods, all $15-$20 and all different. I collected them over our two year engagement. The letters I found at Hobby Lobby and spray painted gold. The Ball jars took the most time to get just right, but even still, we very simple. My Maid of Honor and I spray painted some of the grape vine sprigs gold, combined them with the natural sprigs and some eucalyptus and dried moss at the base of the jar. I used quart Ball jars. All of the supplies for the Ball jars were easily found at crafts stores.

Bridget & Joe-258

Bridget & Joe-259

Bridget & Joe-256

Bridget & Joe-255

I love how they came out and I didn’t miss the flowers at all!

I hope these Wedding DIY posts have inspired you to do some of your own wedding personalization. It made our day so much more special knowing we had put our hand into making the day a reflection of us. We enjoyed the process of creating the vision we had of our wedding – thanks for joining me along the way!

Cheers,
Bridget XOXO

Sunday, October 18, 2015

Wedding DIY: Flower Crowns

Bridget & Joe-12
Our wedding was primarily garden themed and since it was in August we wanted a few seasonal accents…. in-season flowers, light suits for the guys, airy dresses for the girls… and flower crowns. Who needs a good excuse to wear a flower crown? nobody. They’re awesome. But I also thought they might be a fun addition for pictures and partying, adding to the boho flair in our wedding.

I found this very simple tutorial at Green Wedding Shoes. I did not use live flowers, but silk, and they came out beautiful! I raided the craft store for on-sale small flowers and went to work. My Sister-In-Law Julia got the hang of this way faster than I did – it takes a good amount of hand-eye coordination. Be creative, have fun with them, and don’t worry about messing up – you can always pull some flowers out and add others.

Bridget & Joe-10
Bridget & Joe-9

Bridget & Joe-356
Bridget & Joe-357
We also ended up making some big fun flower crowns for the photobooth and they were a huge hit!

 
Thanks for stopping by!
Cheers,
Bridget
XOXO

Monday, September 28, 2015

Wedding DIY: Cake/Pie Bunting

I was surprised at how difficult it was to find cake or pie bunting for our wedding pie… yeah, there are some on Etsy for a pretty penny, but nothing that would get here in a reasonable amount of time before our wedding. So I spent an hour (literally) figuring out how to make this bunting and putting it together.
Note – we had a wedding pie. No, it’s not the popular thing to do (yet) but we aren’t huge cake people. So we chose some yummy pie from a local farm: Lyman Orchards! This is also why we chose bunting… because, well, a cake topper would have just sunk. And that would not be good symbolism for a wedding.

Bridget & Joe-555 

What you will need:
Fat burlap ribbon (wired)
Black paint pen (white did not stand out enough)
Twine
Two chopsticks or sticks for photobooth props
Craft glue
The Usual Suspects: scissors, sewing machine, thread

1. Start by cutting approximately 2inch wide triangles from your ribbon, with the wire at the base of the triangle. Cut enough triangles to spell out your desired phrase… mine was “Just Married”.
IMG_20150801_123407_728
2. Cut 2x 3ft pieces of twine – we’re being generous here, you can always trim off the excess later. If you only have one line, you only need on piece of twine.
3. Pin your triangles in a row on the twine. Using the serger or zigzag setting on your sewing machine, sew down your triangles to your twine. Repeat for your second line.

IMG_20150801_123515_069 IMG_20150801_123521_461 (1)

4. Draw on your letters with your paint pen, making sure to do this over a newpaper or something you don’t care about ruining. Don’t use a sharpie – it will bleed!
IMG_20150801_133927_635
5. Tie your bunting onto your chopsticks or other sticks (sticks from the backyard would be CUTE… but might not be food safe.). Add a dab of glue to your stick where you are tying your bunting… this will keep it from untying or moving.

IMG_20150801_123614_693
6. Tidy up—straighten everything and bend your triangles to where you want them (remember—they have wire at the top!).
7. Stick at an angle into your pie or cake.Admittedly, bunting works best in cake because it is dense, but ours held up ok in our pie too. Totally recommend testing in some pie first (also a great excuse to buy and eat some pie).

IMG_20150928_130609_563
Also, our bunting was kinda big for our pie… use chopsticks instead – we used sticks that you could make photo props with and they were not the best.

Bridget & Joe-562
PPS. Big shout-out to For Such a Time Designs for the amazing vintage silver server… find her here on Etsy!

I hope you’re enjoying these wedding DIY posts!
Thanks for joining me!
Cheers!
Bridget
XOXO

Thursday, September 17, 2015

Wedding DIY: Distressed Window Seating Chart

Bridget & Joe-556
Cutting a few corners, without cutting style and vision, was the key to making my wedding day everything I wanted it to be. I’m a nurse- I’m one of the most practical people you will ever meet, but I do love my style. As I show you some of the DIYs I tackled for my big day you will see what I mean – I didn’t see any sense in unnecessaries, but I also had a vision of a rustic barn wedding that I wasn’t going to let go of either.
One of my favorite pieces of the day was my seating chart. Escort cards or reception cards averaged between $100 - $150, even at the lower price scale. I though maybe I could make my own, but I wouldn’t be saving a whole lot more… and would be buying myself a lot more time consumption. On random Monday whilst browsing at ReStore for inspiration for new projects, I stumbled upon a bunch of old windows and paned doors – with the price written on the panes in chalk.  LIGHTBULB. I found a window (actually it’s an old half of a French door set) with enough windows to fit 120 names… and I bought it for $35. Actually, I bought two because I wasn’t sure how much writing space I would need. See Instagram:
11282710_437404216437589_1872103988_n
I went to Amazon.com and bought some liquid chalk pens in white and started doodling. I was lucky because my window was pretty distressed already, I didn’t need to do much to it. BUT if you find a window that needs a little loving, take some sandpaper and rough it up a little. I didn’t use the big orange door – but I had big plans to paint and distress it if the smaller window didn’t make the cut. In fact… I may use it as a door to my dining room….
I digress.
IMG_20150902_121049_008
Things to note:
- Wash the window/door thoroughly before writing
- Get more than one chalk pen – you WILL run out as soon as you almost finish
- Make sure your window will not be up against a light background – it will be hard to read
- Have a wet paper towel ready for when you mess up, it will save you some frustration
- TAPE A PEN TO THE BACK. Please… save yourself a headache on your wedding day… if for some reason something rubs off, a pen will be right there to fill it back in. We had no issues with rubbing or smudging, but ward off the evil spirits and attach a pen. From one bride to another, you don’t want to think about things like this on your wedding day.
This window WILL get reused – I’m thinking of putting pictures in each window pane and hanging it in my craft room… oh, the possibilities are endless! sigh.

Thanks for stopping by!
Cheers,
Bridget
xoxo

Tuesday, April 8, 2014

Honeymoon Basket

What do you give a to-wed couple who has all the usual housewares and doesn’t want anything? I recently had this dilemma. One of my closest friends, Erin, is getting married in June. She didn’t want the usual house stuff; she has a house and all the fillings already. So then what do I give her? Lingerie? Overdone. Booze? Uncreative. Money? Expected. The one thing she was interested in? Contributions toward her honeymoon. Perfect!

IMG_20140408_101105_247

Honeymoon Gift Basket: chuck full of items for the couple on their honeymoon. Erin and her fiancé are going to Jamaica so I loaded them up with beach necessities and other fun vacation items.

honeymoon basket numbered

Items I included:

1. Fedora – to keep the bride stylin’
2. Sippy cups – mason jar style! Perfect for drinks by the pool or on the beach.
3. Beach towels
4. Ibuprofen – for mornings after hehe
5. Hand sanitizer – I can’t help it, I’m a nurse
6. Tums – also for mornings after, but also for all that delectable food they’ll be eating
7. Waterproof camera – skinny dipping pictures optional
8. Gum – to keep that breath fresh!
9. Chapstick with SPF – to keep those lips ready for kisses!
10. KY – self explanatory! Keep it PG people, this is a family friendly blog.
11. After Sun lotion/ Aloe – to ease skin after days in the sun
12. Sunscreen – to prevent sunburns that could ruin the trip!
13. Luggage Tags

I bought all of this stuff at Target, Homegoods, or online on Amazon. I think I might also add a bottle of champagne or a handful of nips. You can really get creative with the stuff you include! I went pretty practical and functional, but you could definitely add more romantic things or joke gifts.

IMG_20140408_102157_500

IMG_20140408_101105_247

IMG_20140408_102324_975

Best wishes to my great friends Erin and Bill on your coming nuptials! Can’t wait for the big day!

Thanks for stopping by!
Cheers,
Bridget XOXO