I live with my boyfriend, Joe, who frequently joins me on my adventures (creatively coined the Adventures of B&J). We have never been afraid of doing new things, which has truly provided us with incredible experiences and fueled my desire to tackle my DIY side.
Joe has a particular passion for adventure and endurance running, which he blogs about at Instinctual Running. He has been itching to get me to start a blog for months. Finally, the other day he asked if I would guestblog on his site about how to make sandbag weights for his cross-training workouts. Joe and I originally thought to make them when we ran an obstacle race earlier this year that used them as part of an obstacle. We looked into buying them, but quickly learned that the shell alone can cost up to $100 each. Really, they’re glorified pillows with sand in them. So I decided to make them! I chose durable, utility fabric instead of the neoprene that others were using… they have held up great!
Here’s how to make your own weights… great for workouts, doorstops, sandbag seats or whatever else you can come up with!
How to make your own Sandbag Weight
2 yards Duck Canvas- single or multi colors ($10.99/yd)
piping filler (about $6 bucks)
Sewing Machine with zipper foot
Bag of Playground Sand ($4.00 per 50lb bag)
Step 1:
- Cut circles from fabric to desired size of sandbag
- The easiest way to cut a circle is to find a bucket or bowl about the size you want and trace it onto the fabric with chalk – this will ensure a symmetrical and round circle.
- Remember, you will need at least a half inch around the edge of the fabric to sew on piping.
Step 2: Piping
- First, you’ll need to cut strips of fabric to sew over the piping.
- Fold from corner of fabric to make a 45 degree angle. Measure & cut 2 inch strips of fabric on the diagonal (this will prevent twisting when sewing).
- GREAT site to learn how to sew piping – it’s easier than you think!
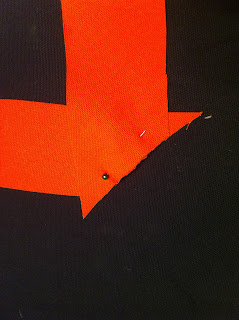
- Pin together strips (overlap edges a bit) as shown in the picture and sew pieces together
- Once sewn, they will make one long strip of fabric
- Take piping and place in the middle of sewn strips and sew tightly against the piping using the zipper foot.
Step 5:
- Once Piping is complete, cut slits (about 1cm apart) along the sewn piping liner. Do not cut past the stitch in the piping, though!
Step 6:
- Pin down the piping liner just inside the cut circles of fabric, with the open end of the piping facing outwards around the circle.
Step 7:
- Sew down the piping around the circle, removing the pins as you go.
- When it comes to sewing the two ends of the piping together, overlap the two ends in an X, with the ends pointing outwards (toward the outer edge of circle). Sew over middle of X to “seal” out ends.
- One half is complete!
Step 8:
- Take the second circle and lay on top of completed half, outside facing up. Pin down around outer edge of piping and sew top layer as closely to piping as possible. Be careful to leave an opening approximately four inches long.
- Turn sandbag shell inside out.
- Fill with desired amount/weight of sand.
Step 10:
- Fold edge of opening to match up to piping and pin. Sew along folded edge to close up opening.
Voila! Your sandbag weight is complete!
We were able to make four sandbags with 2 yards of fabric – two 30lb and two 10lb. We needed an extra bag of sand, but had some left over.
Total: $32.00 for four sandbags
I thought to add handles, but Joe didn’t want them. If anybody tries to add them, let me know how they work!
Please post questions if you have them! :)


Thanks you guys are awesome!! I recently just made ab- wheel(s), even though the ab wheel can range from $9 to $50 especially the ones with foot straps. I made individual ab wheels for the R and L hands; I’m going to make 2 more with foot straps!!! Also I put together my own TRX, which is just lashing straps with handles. Last time I checked lashing straps did not cost $100 to $300.
ReplyDeleteGreat info! Thanks so much for posting. What was the diameter of your different sandbells/wt. levels? Thanks again!
ReplyDelete